I wanted to build a 2 x 72″ belt grinder. I did a bunch of research and formulated a plan as follows.
The best resource I used a lot was http://dcknives.blogspot.com/p/2-x-72-belt-grinder.html
Others that helped
https://www.instructables.com/id/2X72-Belt-Grinder/
https://www.makingstuff.info/projects/belt_grinder?AspxAutoDetectCookieSupport=1
https://www.youtube.com/watch?v=n03JraRgD2k
https://www.youtube.com/watch?v=a_RlL1O-bK4 (folding unit) http://jerswoodshop.com/2×72-tilting-belt-grinder/
https://www.youtube.com/watch?v=H9iUww8yGxI
This is the order I placed at onlinemetals.com for
- 2 pieces @ $14.01/piece Mild Steel A36 Hot Rolled Rectangle 0.25″ x 8″ x 12″
- 2 piece @ $22.07/piece Mild Steel A500 Hot Rolled Square Tube 1.5″ x 0.25″ x 36″
- 1 piece @ $42.93/piece Mild Steel A500 Hot Rolled Square Tube 2″ x 0.25″ x 48″
- 1 piece @ $25.77/piece Mild Steel A500 Hot Rolled Square Tube 2″ x 0.25″ x 24″
and from oregonblademaker.com/
- Belt Grinder D-Backing plate for 2×72″ knife making grinder with wheels
- Belt Grinder Tracking Wheel for 2×72″ knife making grinder with bolt axle
- Belt Grinder Drive Wheel for 2×72″ knife making grinder 5/8″ bore
- Belt Grinder Flat Platen for 2×72″ knife making grinder, hot rolled steel 2″
I had a 3 hp Lesson 220v electric motor that was used.
I also ordered these from Amazon
- 2″ X 72″ Knife Makers Fine Grit Sanding Belts, 6 Pack Assortment
- 2 X 72 Inch Knife Sharpening Sanding Belts – Ultra Fine Grits – 4 Pack Assortment
- 2″ X 72″ Knife Makers Coarse Grit Sanding Belts, 6 Pack Assortment
I had the basic builds done in a day. I followed the basic build from http://dcknives.blogspot.com/p/2-x-72-belt-grinder.html with just a few modifications.
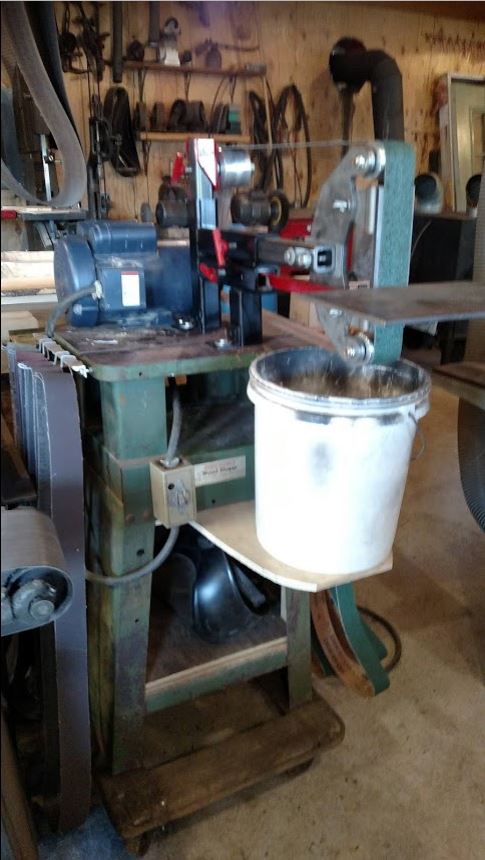
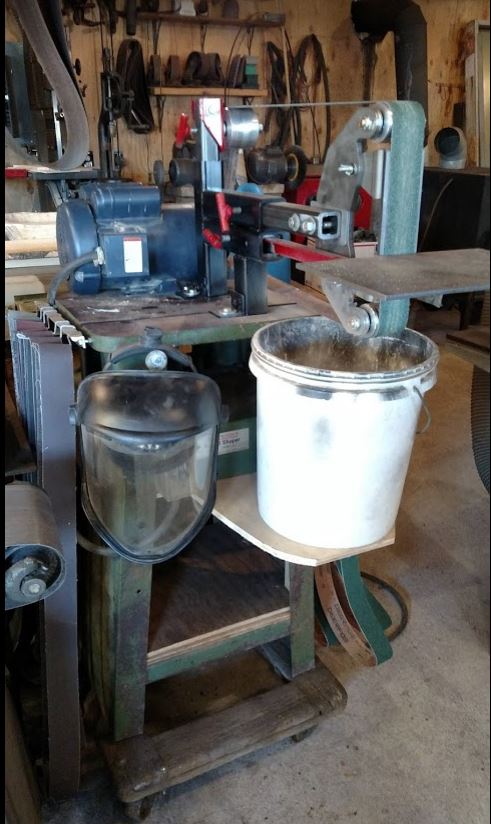
The base was an old Harbor Freight shaper that I parted out.
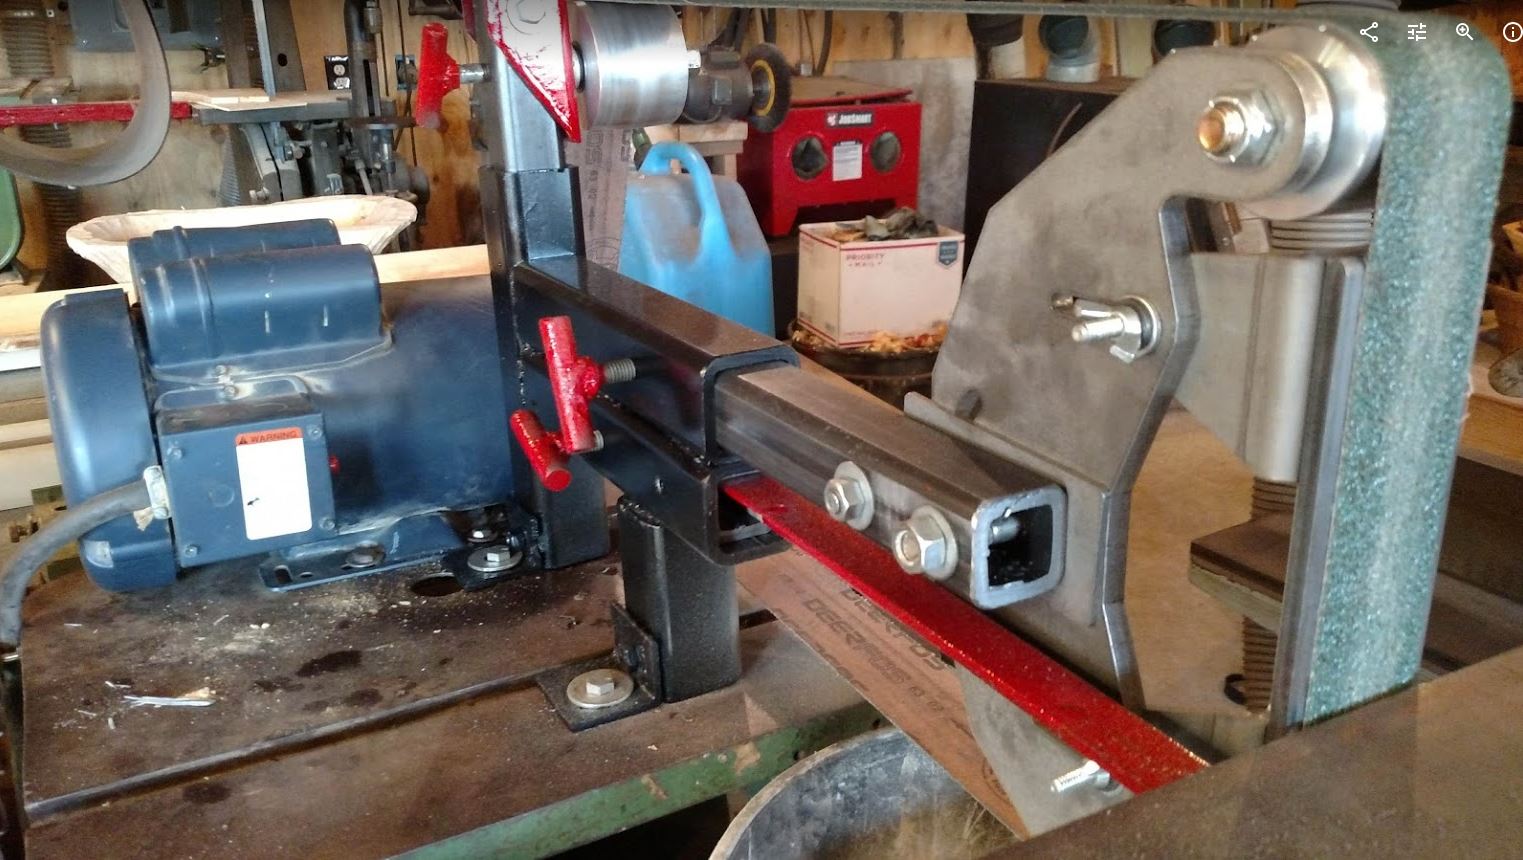
I originally want to make this fold to go horizontal. I’ve bolted it to the base instead of welding it so I can still do that if I decide to. I will wait to see how many times I wish I could flip it.
I wanted to add a VFD, but it seems it’s not a good idea with this motor. Unfortunately, this Leeson 115048.00 is a single-phase capacitor-start type motor, so there are no variable frequency drives or other speed controllers that I could find capable of driving this. If it were a three-phase, then there would be several solutions.
I may look for a cheap treadmill and replace the motor someday. We’ll see how it plays out.
All the parts arrived pretty quickly from oregonblademaker except the drive wheel. It somehow got left off. An email to them got me one in the mail, but it still pushed back completion by over a week. Some of the images show the grinder with the pulley still on. The drive wheel has been installed however.
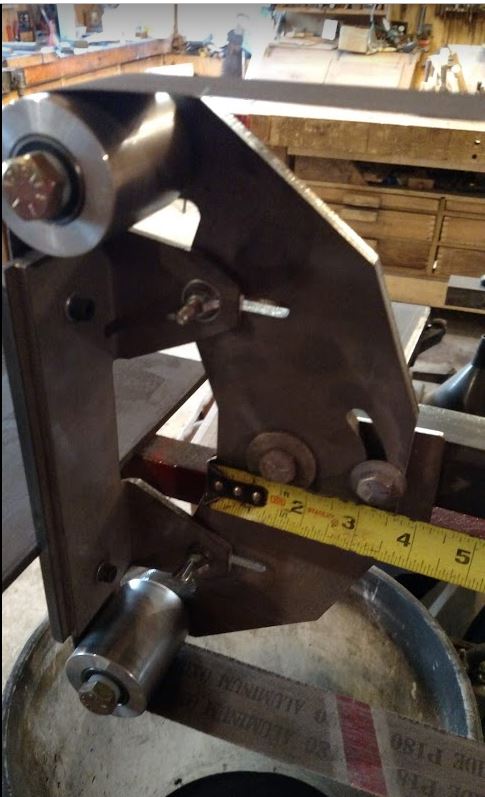
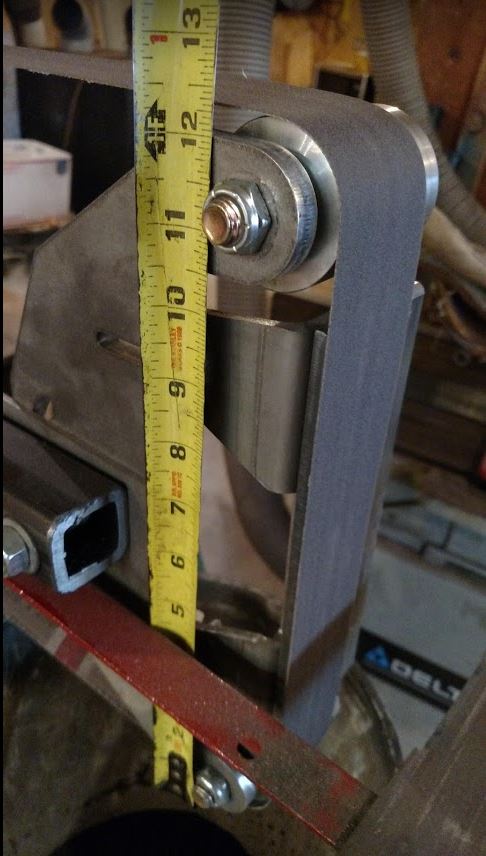
Add the end to the belt adjuster post ( not my best welding job) I tried a spring from a storm door like mentioned on dkknives but it didn’t work very well. I will need to find a better option.
These 2″ x 1/4″ pieces were cut on the bandsaw. 3 at 10″ and 1 at 4″ just like the plan called for.
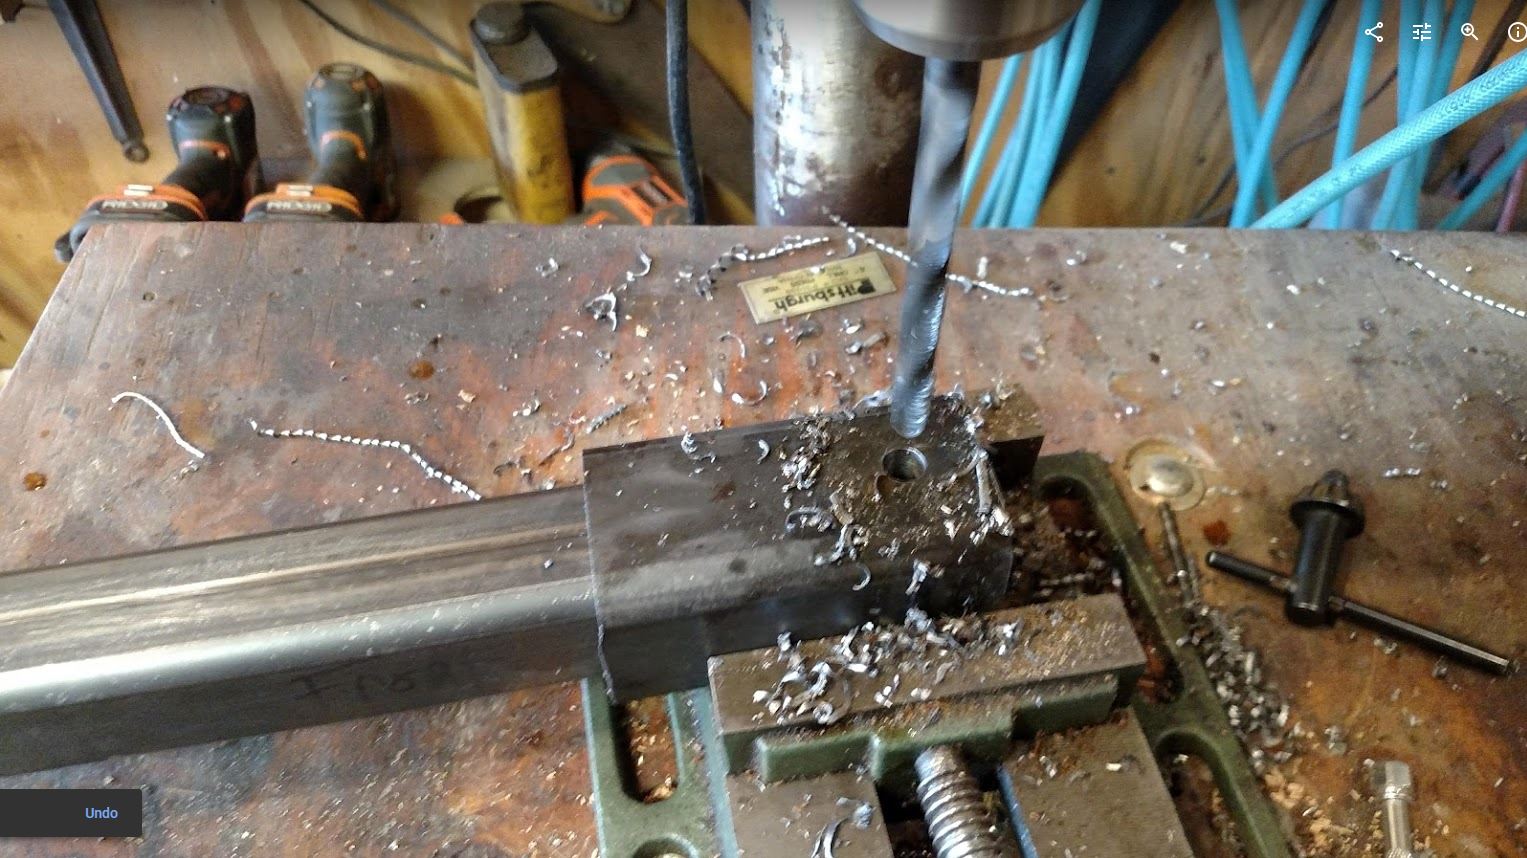
I drilled the through holes for the adjuster wheel before cutting it to shape to ensure I could get a straight drill.
The angle was cut with a cut off wheel in the grinder. I really need to get a metal chop saw!
I didn’t have a bolt with enough threads for the retainer bolt, so I had to add some more threads.
At the end of day 1, it was in somewhat working order. I suppose we could have called it fully functional if the drive wheel had arrived with the rest of the oregonblademaker supplies.
I decided to bolt the grinder to the base with a piece of angle iron. This to was bolted in case I changed the configuration later on (like making it fold to horizontal)
I intentionally put the face shield hanger over the switch so I can’t turn the grinder on without grabbing the face shield.
I welded a 2” piece of rod to the bolts to make a wing style bolt.




Keep in mind used treadmill can be had for pretty cheap usually and are good sources for motors and controls. Also used table saws (especially the older Craftsman) which would make a great base and potentially a motor as well.
Update: I found the guide to be to wide. I would have to bend over it, so I cut it down to 4″

Edit: See the variable speed upgrade
________________
As an Amazon associate, we earn income from qualifying purchases when you click on a link. Your link clicks help us fund our website.________________








[…] I built my belt grinder i used a 2 hp single phase motor I had on hand. I wasn’t exactly sure how much I’d use […]
[…] struggled with the plunge line at this point. My grinder was not variable speed yet and I was determined to use it beyond my skill level. This knife came […]
[…] you’re using a belt grinder, hanging the belt off the edge of the platen gives a more subtle plunge line. No overhang gives a […]
[…] not sure this term is being used technically correct, but it’s close) was done on the belt grinder. I try to design my knives based on the equipment I have to simplify the […]
[…] I went to the grinder and ground and finished up to 320 […]
[…] down the grinder also allows to keep going on a full grind from one end to the other without the blade getting to hot […]
[…] To the right it is being normalized. Notice the groove (or fuller) in the tang. I cut that with the belt grinder. It serves a couple of purposes. It lightens the knife. It makes less surface area of the tang that […]
[…] belt grinder […]
[…] I built my belt grinder i used a 2 hp single phase motor I had on hand. I wasn’t exactly sure how much I’d use […]