My Journey into Blacksmithing & Bladesmithing
Part 2 BLADESMITHING – MY STARTER TOOLS, JIGS AND SUPPLIES
I made my first knife when I was a young teenager. So that would put it about 50 years ago now. Back then we didn’t have internet, or Google, or YouTube, so information was much harder to come by.
The knife was stock removal (although i didn’t know what that was back then) from a piece of leaf spring. I used an old angle grinder. I somehow knew I had to heat treat it, but I had no idea what that meant.
I remember I made two knives. They looked a little like Bowie knives and I went around the farm bouncing them off trees and stumps and whatever else I could find to throw them at. I’m not sure they ever stuck in anything. They were not at all balanced.
Today, with all the abilities to gather information, it’s easier to take up and learn different techniques and processes.
I’m not sure what sparked the resurgence of my desire to form metal into things shaped like axes and knives, but I’ll share the journey. If you, learning from my mistakes, makes your journey better, I’ve done my job.
I tend to like to make tools I use if possible. And that’s an attribute of most blacksmiths. Now I get I can’t really call myself a blacksmith or a bladesmith, but I’m certainly undertaking some of the activities of one. That’s what this is about. Learning. Never stop learning.
Most of use can’t just go out and buy a new shop when a mood strikes, so we learn to use what’s available. That was my approach when this started.
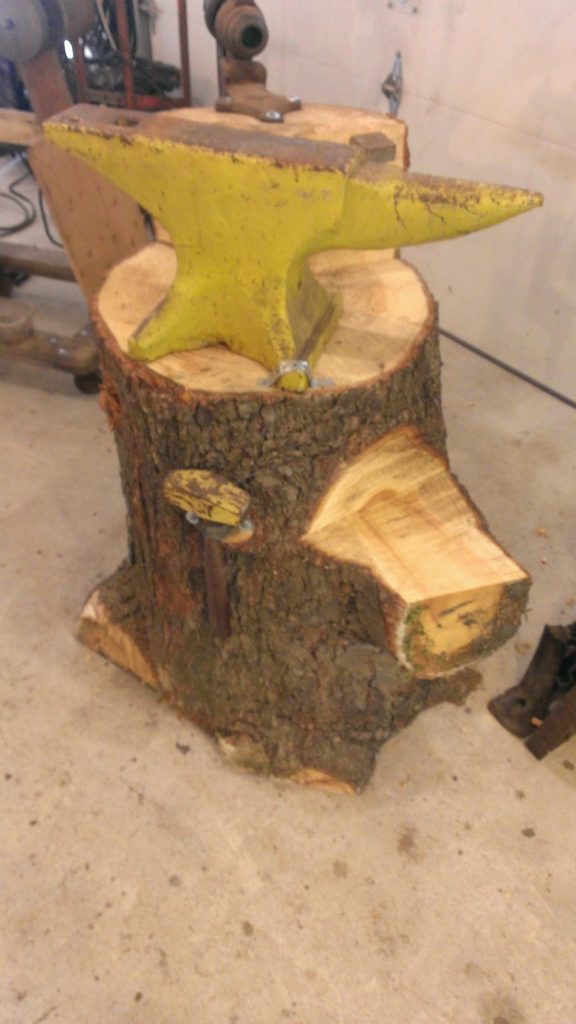
I had bought an anvil a few years ago from Tim Bailey. As usual, Tim gave me a good price, and since it was something I’ve wanted since build that first knife 50 years ago, it came home with me.

The first thing I did was built a stand from an old stump. You’ll note a blacksmith vise in the photo as well. That was a flea market find from a few years ago as well. At $35 I couldn’t leave it behind. You will want some kind of vise, but a leg vise like this isn’t a requirement. I tend to use my bench vise more, but if your beating hard on hot metal, the leg vise is constructed to take a little more punishment. For now, even a few clamps will probably do you.
Don’t think you’ll need either of these for your start. You really don’t need an anvil to make knives, but you will if you plan to forge knives. But even then, almost any heavy solid chunk of flat steel will work. A chunk of railroad track is an often used anvil replacement.
You can easily start your journey with stock removal. Stock removal is simply taking a piece of metal and cutting and grinding away to shape your piece. Many bladesmiths never forge, they make all of their knives with this method.
In this stage of my journey, I do both. Some of my knives are stock removal, and some are forged. My journey will include blacksmithing and bladesmithing, so both makes sense.
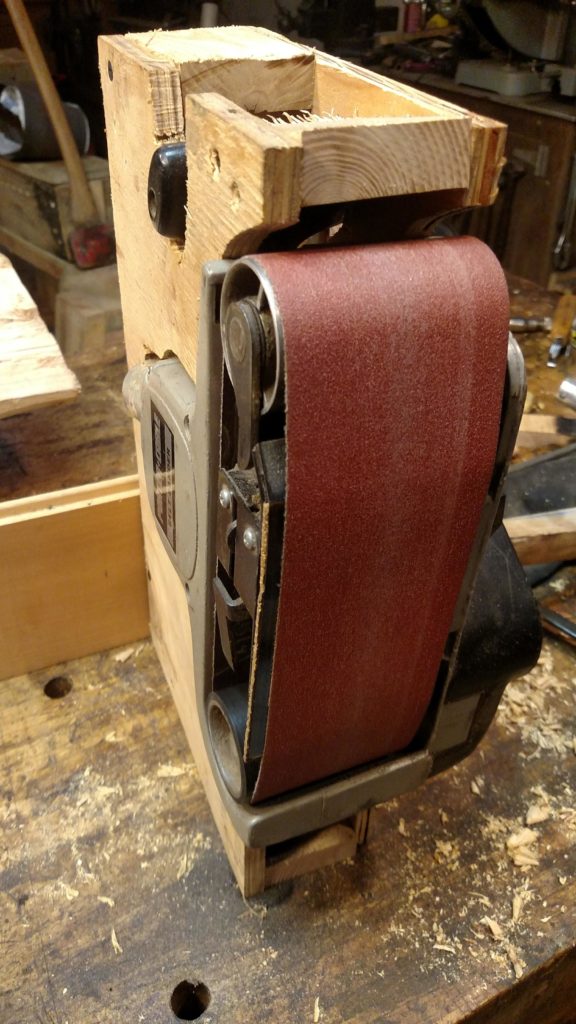
In line with using what I had, I started my stock removal using a belt sander. I made a stand for it. This worked and to be honest if I had taken the time to build some jigs, it would have worked much better.

My next step to improve this was to build this 2″ x 72″ grinder. This of course made a huge difference, but it’s definitely not a requirement. Use what you have or what you have access to to start.

I made my fist knives out of found metal. An old file, or a piece of leaf spring. But the first really decent knife was from a brand new piece of 1080 high carbon steel. My recommendation is start with a few pieces of known steel.


Choosing Stock
I chose 1080 because after some extensive research I found that 1080 is a long standing standard for making knives. It makes exceptional knives, is somewhat forgiving in heat treatment, and of the good steels to work with, it’s one of the easier metals to work with and find. It’s also reasonably priced.
Heat treatment
Next I needed a way to heat treat my knife. I decided since I’d also like to forge, I needed a forge. Your basic choices are coal or propane. I currently have both. If you’d rather not have a forge at this point, you can either find someone to heat treat them for you, or send the blades to be done. Many bladesmiths offer this service.
My Propane forge build is here
I don’t use the coal forge much. I can’t find a local source for blacksmith coal, and the home heating coal at Tractor Supply is a pain to use in my opinion. It works, and I plan to continue to use it from time to time, but I find the propane much more convenient for what I am currently doing.
I chose to build my propane forge to save some budget. There are two things I’d change if I had to do it over. First, I would have just bought my burners from Zinger……… and I wouldn’t have put a second burner on. I almost never turn the second one on. It wasn’t necessary. By the time I bought all the little parts, the savings compared to just buying the burner didn’t make sense.
________________
As an Amazon associate, we earn income from qualifying purchases when you click on a link. Your link clicks help us fund our website.________________


[…] Moved here https://bladesmithing.timetestedtools.net/my-journey-into-bladesmithing/ […]
[…] scales. The pins are brass. I choose 1080 because of it’s simplistic qualities. As I said in “My Journey into Bladesmithing” my recommendation for the first few knives is start with a few pieces of known […]
[…] or angle grinder could be used in place of the belt grinder or even the belt sander mentioned in Part 1. It will take a bit more patience and a steadier hand, but it is completely […]