
Knife 34 – Hidden Tang Aluminum Framed Knife
- 1084 Steel
- Framed hidden tang
- Drop point.
- Blade length 6”
- Handle length 4 ¾”
- Overall length 11”
Knife 34 – Hidden Tang Aluminum Framed knife – Here it the process for this knife.
Layout and design. Basically, this was marking the basic outline on the steel.
On this knife I did another Jimping sample and decided to use 9/32″ spacing

The jimping was first laid out and cut with the band saw. A hacksaw would work well here if you didn’t have access to a bandsaw. I then started the filing with a triangle edge of a file. I then used a chainsaw file ADD FILE SIZE> to cut the Jimping. I cut 10 Stokes on each hole until the cut marks disappeared. That way I had even depth all the way across. (See Adding Jimping to your knife)
- I the ground the blade profile only
- I marked the blade center
- I marked the blade start line
- Using a grind stop I ground the blade bevel.
- I marked out the aluminum frame and cut it out on the band saw and used the belt grinder to finalize the rough shape.
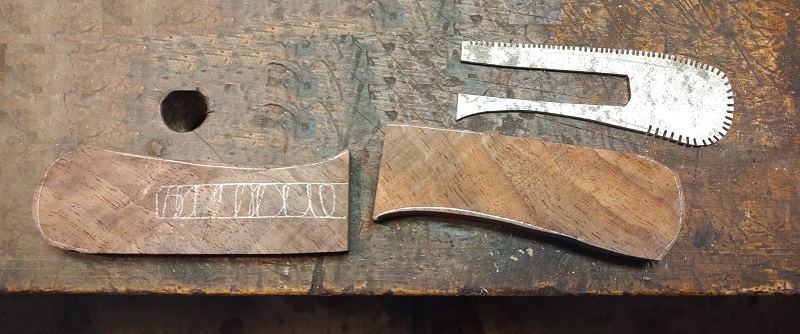

I cut grooves in frame with bandsaw. These were just cut free handed.
I found a piece of Walnut and cut the scales fr this Knife 34 – Hidden Tang Aluminum Framed Knife.
I test fitted the scales and frame to tang. I marked the outside outline where tang is going to be after installation.
I epoxied the scales and frame together. I used epoxy colored black to accentuate the aluminum frame pattern.
I decided to try grinding this knife free hand. I’ve discovered a couple tricks over the last few knives. Since they are working and improving, I’ll share them here. First, being able to slow down the grinder helps with control a lot.
Also, you need to make sure you move up the grit sooner than I thought to get the aggressive grit marks. I also discover I can move to hand sanding quicker, and back to the belt if needed. Hand sanding shows the problem areas that the grinder hides.
Moving back and forth between hand sanding and belt grinder seems to be my training wheels.
Slowing down the grinder also allows to keep going on a full grind from one end to the other without the blade getting to hot to hold.
One thing it took me a while to figure out is during grinding is you want to keep the knife perfectly level through the stroke, just like it was in a jig. Think of your hands as the jig. I have a desire to want to follow the curve at the end of the blade. Don’t do that!
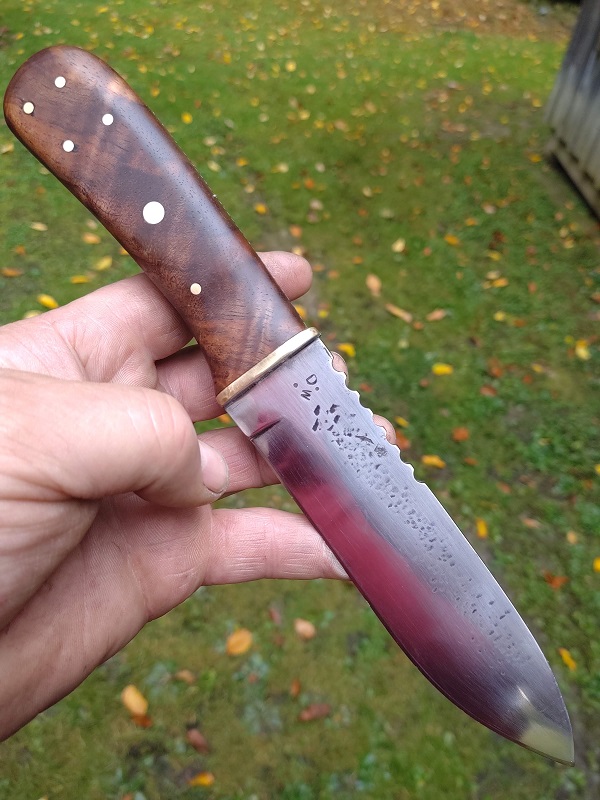
The other thing I decided to try on this knife is a ball peen hammer pattern. I tried on the anvil buy it left scratches on the back side, so off to the bench with a piece of leather under it.
I’ll try this process while forging on a future knife, but this time it was a cold steal hammered pattern.
The knife came out of the quench warped. I used the Temper straightening technique in Temper Straightening a Custom Made Knife
Next step was to hand sand again from 220 grit to 3000.
I then epoxied the handle on the Knife 34 – Hidden Tang Aluminum Framed Knife and pinned both the handle to the knife and pinned the back part of the handle together with the frame.
This was then sanded using the grinder to 600 grit.
I then hand sanded from 500 grit to 3000.


________________
As an Amazon associate, we earn income from qualifying purchases when you click on a link. Your link clicks help us fund our website.________________
[…] My Knife 34 came out of the quench with a small warp. […]
[…] Knife 34 – Hidden Tang Aluminum Framed Knife […]
[…] Knife 34 – Hidden Tang Aluminum Framed Knife […]